How to Set Up Multiple Web Server Instances for Dynamics NAV Web Client (Part 1)
No, you guessed wrong! I am not going to add another blog to explain how to use Powershell to create and set up a Dynamics NAV Web Instance.
As a quick reminder, you can refer to the official Microsoft documentation and use Microsoft Dynamics NAV Administration Shell to easily create a new web instance.
But what if you cannot use Microsoft Dynamics NAV Administration Shell? Yes, now you guessed right. This is the reason behind this blog post.
Scenario (summary in three points):
- You installed NAV Server and Web Server on separate machines.
- On your NAV Server, you can locate Microsoft Dynamics NAV Administration Shell.
- On your Web Server, you cannot locate Microsoft Dynamics NAV Administration Shell.
You quickly notice that you cannot apply what MSDN says, because you simply do not have Microsoft Dynamics NAV Administration Shell installed on your Web Server.
What is the solution then? From my side, I explored two options:
- Powershell remote session from NAV Server to Web Server and apply the New-NAVWebServerInstance
- Build a Web Instance from scratch
I quickly dropped the first option due to network and firewall issues and because the second option sounded more fun ;)
So, let’s build that web instance.
To achieve that, open your IIS and locate the default Web Instance, “DynamicsNAV90” in my case.
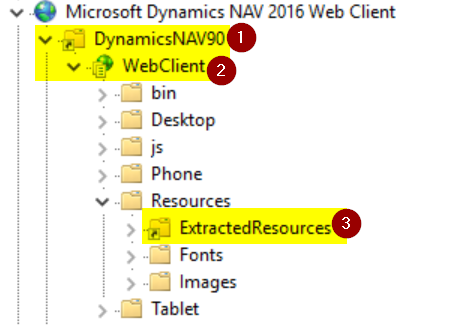
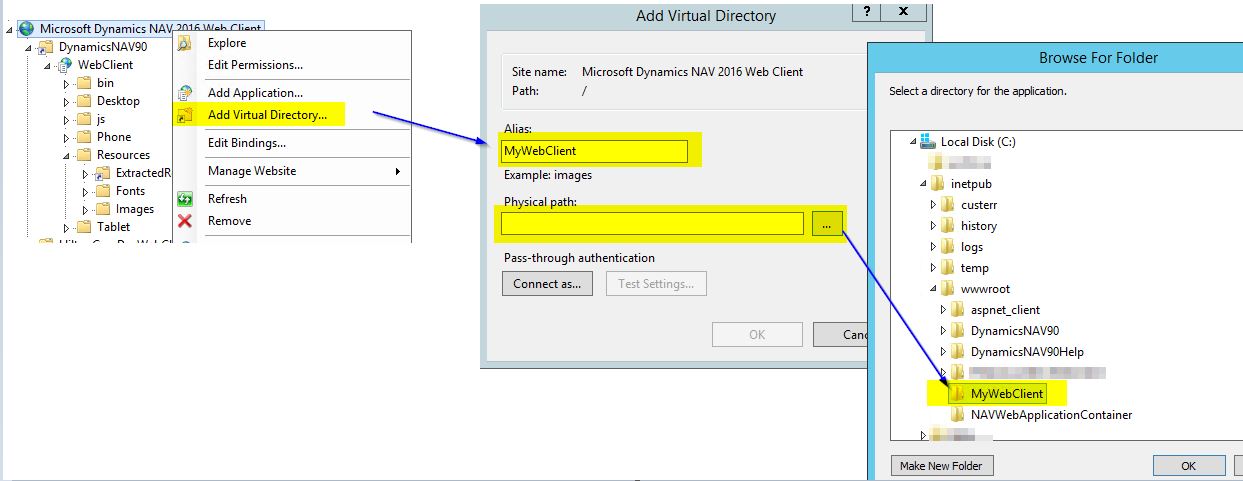
It is easy now. You just need to create the same structure (I highlighted the important parts):
- Create a virtual directory
- Give it a name: MyWebClient
- Point the physical path to a folder:
C:\inetpub\wwwroot\MyWebClient
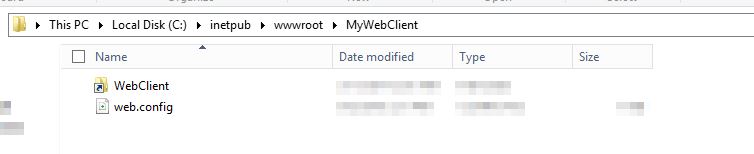
Now, execute this command line as administrator:
mklink /d "C:\Inetpub\wwwroot\MyWebClient\WebClient" "C:\Program Files\Microsoft Dynamics NAV\90\Web Client"This will create a symbolic link to C:\Inetpub\wwwroot\MyWebClient\WebClient that points to C:\Program Files\Microsoft Dynamics NAV\90\Web Client.
Then, copy the web.config from the default web instance and paste it to MyWebClient (change the web.config to point to another NAV Server if needed):
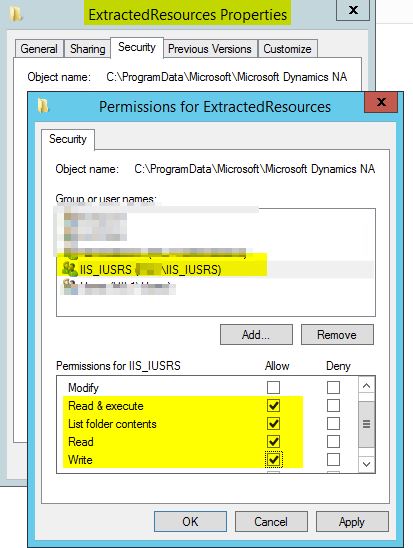
Now, create the following folder C:\ProgramData\Microsoft\Microsoft Dynamics NAV\90\Web Client\MyWebClient\WebClient\Resources\ExtractedResources and assign the following permissions to IIS_IUSRS:
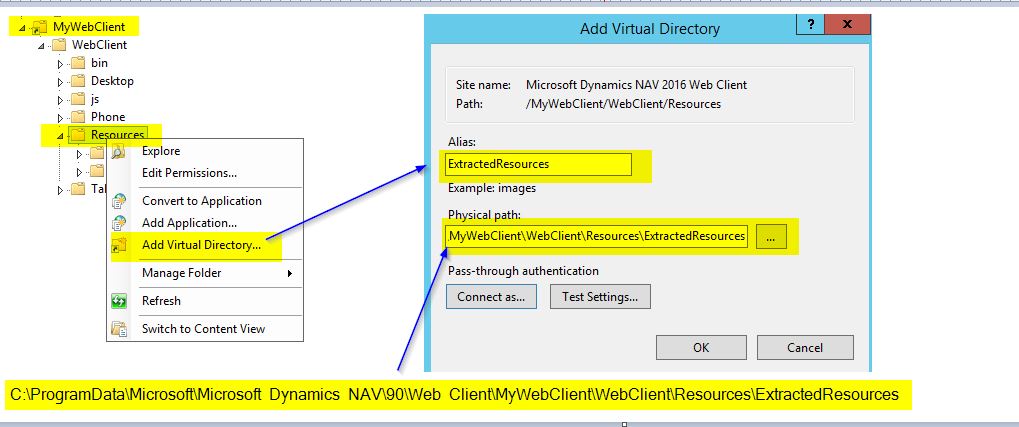
Create a Virtual Directory that points to the folder we just created:
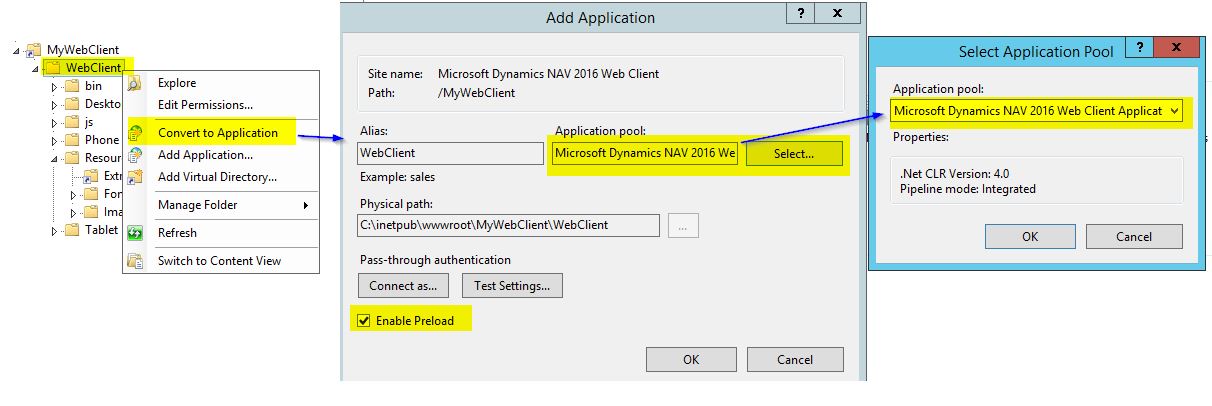
Last step, convert “WebClient” to an application:
Now, try to connect to your new and freshly created web site: http://localhost:8080/MyWebClient/WebClient/
Note: In this blog, I used NAV 2016 as an example. But the same applies to all NAV versions with a web client. I used the default installation folder; you may need to adapt this for your test. Try this trick at your own risk!
This blog is also available on the Microsoft Dynamics NAV Community.
Additional Resources
Have questions or suggestions? Feel free to reach out via LinkedIn or Twitter.